Tuesday, January 17, 2012

Homemade Holidays Part 3 - Aprons

I had a wonderful weekend for Martin Luther King, Jr. weekend.  No, it didn’t include any type of celebration for the man who gave the “I have a dream” speech.  Even though I do believe he should be given credit for the accomplishments that he made in the way of civil rights.


No, my weekend included a visit from one of my best friends from college.  We are often mistaken for sisters, which is not the case, but she is always welcomed into my home like a sister!  We spent the weekend watching football, making delicious crock pot recipes and overall just spending time together. 
 

I attempted to send her and her husband their Christmas present before Christmas, but I somehow managed to write down their old address, so their present came back to my house.  So I held onto it this time, since she was coming here, after all!!  Then, I made her model it for me and this post!

I think wearing it a little higher on the torso makes it look cuter!  And it'll cover her baby bump as it continues to grow!


I made all of my girlfriends an apron of their own using this tutorial.  I wish I could give you advice or tips on how I improved on the tutorial, but alas, there is nothing that I did that helped me make the pattern better.  And because I made 13 of these beauties, I really got a feel for my sewing machine, which I am still attempting to conquer!!  I did use a bar from my blinds to assist with turning the straps inside out instead of a turner-outer-thingy, since I don’t own one of those……yet!  One thing I did think was awesome about this tutorial...I learned how to stain on the grain of the fabric by tearing it!!  So smart.  I will be using this trick a lot!


Sorry I was unable to get a picture of each apron.  Because my Christmas celebrations spanned almost the entire month of December, as soon as I had one made, I was giving it away.  Sometimes I had it completed a whole 30 minutes before I handed over my latest creation to its new owner.  


I am hoping that a homemade apron by Meredith (that’s me!) will be a tradition that all of the young women in my life will receive each year.  As all of us are growing older and settling down with our own families, I think a little something like a cute apron keeps a little bit of classy in each of us!  Or maybe I’m just extremely old fashioned and think that a kitchen just doesn’t seem quite right without an apron, or a collection of aprons.
 

In fact, I remember that my Grandmother used to have an entire kitchen drawer dedicated solely to aprons in her home.  And I might be subconsciously trying to channel my Grandmother and her kitchen.  Aww…now if only I can channel those authentic, southern chicken ‘n dumplins!!


Best wishes for a wonderful week!


Love as always!
Meredith

Friday, January 6, 2012

Homemade Holiday -- Part 2


The Dwyer Family Crest

My family has a love for our heritage.  We keep misc. items around our homes that have special meaning to us and to those that have passed them onto us.  For example, I have my great-grandfathers binoculars from when he was detective in Des Moines, IA and my father has the handcuffs.  We profess to anyone who cares that we have firefighters, detectives, servicemen, Olympic athletes and hunters in our family.  So, to the say the least, we are VERY proud of where we came from.  

My mom and dad each have a tattoo of our family crest.  My sister has the lion from it and some day VERY VERY soon, I will also be getting one of the lion.  I already have one tattoo and as much as that teeny tiny one on my foot hurt, I’m not racing to get the lion placed on my spine at the base of my neck.  It just sounds painful, but alas, that is where I would want it.  I think I’m also scared that the tattoo artist won’t do as good as a job on my tat as he did on my sister's.  Sorry I don’t have a picture of their tattoos, but trust me, they’re done very well.

But anyways, since my family is so proud, and I’m so cheap creative, I decided that my ‘rents needed a way to display the crest that would be visible as soon as they bring you to the house.  And thus, here is the second installment of Homemade Holidays.  So I made them an authentic family crest for Christmas.  TSG was helpful as always.
                                                 

Here’s how it breaks down: 

1.     Use piece of plywood that you erroneously purchased for another project and fill in any imperfections in the wood with wood filler and sand
See the imperfection?

 .       Print out a poster version of the crest and cut and tape it to size.  Measure the size of the outline of the crest and meticulously draw same onto the ply wood and very carefully cut with a jig saw.  Have the paper poster taken from you by your ‘ol so smart future hubby who lays the poster on top of the ply wood and cuts through everything (meanwhile, you’re trying very hard to hold it in place for him since jig saws vibrate the paper out of place every ½ inch)
The wood filler has been added and sanded and the shape cut out

 
3.   Paint the now crest shaped cut out with white gloss paint and let dry.  Repeat until the ply wood seems as smooth from paint as you prefer.  We did two coats

4.       Lay your chewed up poster print out on top of the painted crest and trace the lions outline using tracing paper.  (This truly is my secret to intricate designs on our projects, yep, I cheat!)
a.       Only trace the outline because you’ll need to paint the lion red all over and will go back for black outlining and shadows afterwards
This is a horrible picture, sorry, but this is the printed out poster prior to cutting/chewing it with the jigsaw


5.       Paint in your lion in red and let dry

6.       Touch up the white areas of the crest with paint where the graphite from the tracing paper smeared
7.       Carefully outline your lion and add details for additional tufts of fur and shadowing.  Be careful not to go overboard!  A little goes a long way.  This is also where you should paint in the black things (I have no idea what they're called) on the top corners and bottom center portion.  I cut out a cardstock template for the longer piece and used a cap to crafting paint for the circles to trace onto my crest.

8.       Add two eye lag screws and wire to the back so it can be hung up.  Again, be careful not to get a screw that is too long and will come through the front of the board

VOILA!  You’re done and now you’ve created a true family crest that replicates how crests and shields were made in ancient times.  Well probably not, I’m sure they made them out of precious metals and intricate carvings, but you get the idea.
The Dwyer Family Crest


All my love!
Meredith

Thursday, January 5, 2012

Homemade Holiday - Part 1

Since Christmas 2011 has come and gone, I can FINALLY share what consumed my December.  I literally mean, consumed every bit of it.  TSG was being awesome and even offering to help with the sewing projects (even though he has no clue how to work the sewing machine….Bless his heart!)

My first priority was to totally spoil my twin sister.  We had many projects on the list to get done for her, and obviously did not accomplish all of them.  However, we were able to do the biggies!

Sis was gifted with wine cork wall art.

<><> <><> <><>
Now she just needs to hang it up


<><> <><> <><>
The bottom was painted prior to adding any corks in order to hid the ugly wood color


<><> <><> <><>
Sorry for the bad depth of field.  It was bad lighting and TSG was in a hurry that day

I was inspired by this:

<><> <><> <><>
Sorry I don't know the original source for this, I found it and saved the image long before I started writing this blog or before I knew what Pinterest was

I wanted the corks to touch and not leave all the space in between. 

I started out by grouping my small circular corks in the center of the spheres and gluing those down and worked out from there.  It took some moving and grooving to get them all to fit and look symmetrical, but I think it came out ok.

Also, I thought the edges needed to be finished.  So I cut some 2x4’s down to size.  All the corks were hot glued on and the edges were CAREFULLY trimmed with a circular saw.  True Southern Gentleman (TSG) nailed everything together for me and after what seemed like a month (read, approximately 5 hours), we were done with Melinda’s first Christmas craft!
This is where we dry fit the frame and before paint was added

I think this craft cost me a little over $7.00.  I know, I know, she’s wicked expensive!  The cost included the sample can of paint from Lowe’s ($2.50), remnant pieces of 2x4 left over from other projects, nails and hot glue.  The corks were given to me over the last year.  Originally they were to be used for our wedding, but then we discovered wine isn’t exactly our poison of choice and might not match our personalities very well.

Next up for my beautiful sister was a wine rack that she could call all her own.


I used this tutorial from This Old House  I just decided to spruce up the look a bit with paint and thought I would get really creative and add an accent color to the front brackets. 
                What I learned:
                                Nailing those SOB’s in was a real pain in the arse for TSG
                                I wish I would have painted the interior of the box
                                Primer was an unnecessary step, as it still took 2+ coats of the white
                                I really need to invest in a 4-6 inch circular drill bit
See what I mean about painting the interior?  Just would have added that finishing touch, I think

This project was a tid bit more expensive:
                Painter’s box: $30
                Necessary Primer: $6
               
At first, I thought I was going to be really creative and Mod Podge some fabric to the front brackets for a really cool finish.  No go on that idea.  It was my first attempt at Mod Podge, so it was more of a learning experience.  1. Mod Podge is messy for me and I didn’t work quickly enough.  2.  The brackets were entirely too small and had too many curves for a beginner.  3.  I think I bought the wrong kind of Mod Podge.  I have other plans for this stuff though, so stay tuned

More Homemade Holidays post to come!

Linking up today...my first proper link 
The Shabby Nest

Love as always!
Meredith

Wednesday, January 4, 2012

New Year...Same 'Ol Me!


Happy New Years!!
Well, 2012 is here, and I am both very excited for the New Year to be here, but I can’t complain about 2011 either.  See what I'm talking about here

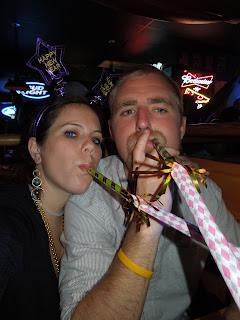
Here is how we spent our New Years.  I hope you had just as much fun in your own way
Empty cocktails.  Not because our waitress was slack either!

A great little sports bar in Andrews, NC (maybe the only sportsbar)

Yummy Bacon cheesy sticks
Happy New Years from Me and TSG

And of course there are a few resolutions for the New Year.  Some are achievable, others are probably just for fun and still some are repeats from previous years.  I can’t say that I complete each resolution every year, but I like to think that I improve in some way and do better overall
1.       Attend church more often – TSG and myself have never lost our faith, we have just haven’t done our best at hearing His word.  But when I really think about it, a 2 hour visit once a week shouldn’t be that hard of a commitment to maintain
2.       Run more often – We ran our first 5K in 2011 and hope to up the ante in 2012 to a half marathon or at the very least a 10K, if not both
3.       Spend more time playing with the dogs.  Living in a populated area has been new to both TSG and myself, and as a result, our pups have suffered from lack of exercise and outdoor attention
4.       Save money
5.       Lose weight
6.       Collect gift cards to Lowe’s
7.       Sew more
8.       Watch less TV
9.       Whine less
10.   Celebrate my loved one’s accomplishments more
What about your resolutions?  Are they repeats/jokes/serious endeavors?

Love as Always!
Meredith